- Getting started with a new Python project
- Creating a Python environment
- Sharing my project (because I’m pretty sure I’m going to need some help)
Last week I joined the ActiveState team as a summer intern and signed up for a free account on the ActiveState Platform. I used my account to create and build a few different projects by following the UX and, in a couple of cases, checking the documentation. I decided to use Python for every project I created because that is the language that I am most familiar with.
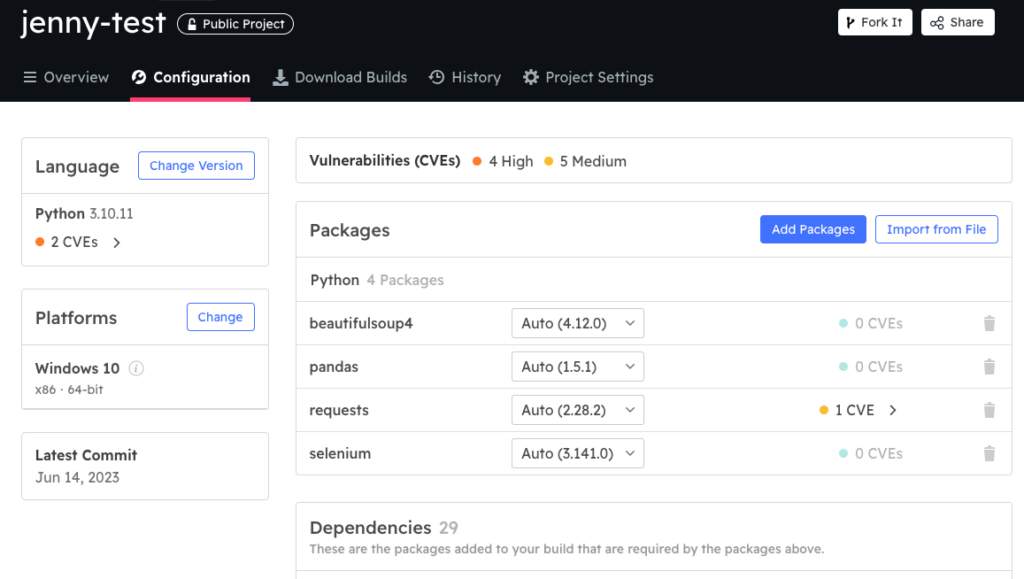
To date, I’ve only ever used pip to work with Python, which is okay, but pretty abstract. While ActiveState provides a pip-like command line interface called the State Tool, I really like the Web UI which showed everything that was going on when I I was building my environment, including:
- All the packages I added
- All the dependencies for each package
- All the security vulnerabilities for everything – even for the version of Python I chose
As a result, I didn’t feel intimidated when I was asked to create a web scraper project in my very first week:
I have written up the steps I took, and all the positives and negatives I experienced. Reading this blog can help you understand how to get started working with Python in general, and using the ActiveState Platform, in particular.
Python Project Setup Made Easy
After logging into the ActiveState Platform, I just clicked the New Project button and chose Python. Everything else – the Python version, my Windows machine, and a name for the project – was already pre-selected so all I had to do was click the Add Packages button and search for the ones I wanted.
This was a really straightforward way to create my first project. I liked how easy it was to add the few packages I needed for my project, and that the security vulnerabilities were shown in the dropdown while I was picking packages. And even though I just went with the defaults, I liked that I could choose from many different versions of both Python and each of the packages. Finally, the Platform pulled in all the dependencies automatically so all I had to do was click on the Save & Build button and then wait a few minutes for my environment to build.
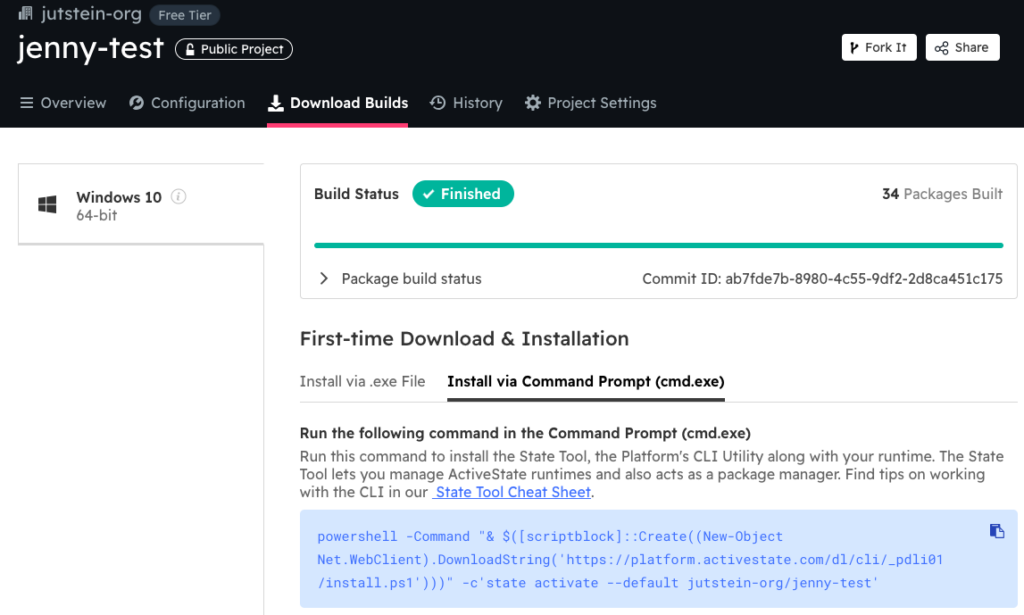
To install the web scraper Python environment on my local Windows machine, I chose to use the command prompt rather than the .exe file, so all I needed to do was copy the prompt and open a CMD window on my local machine:
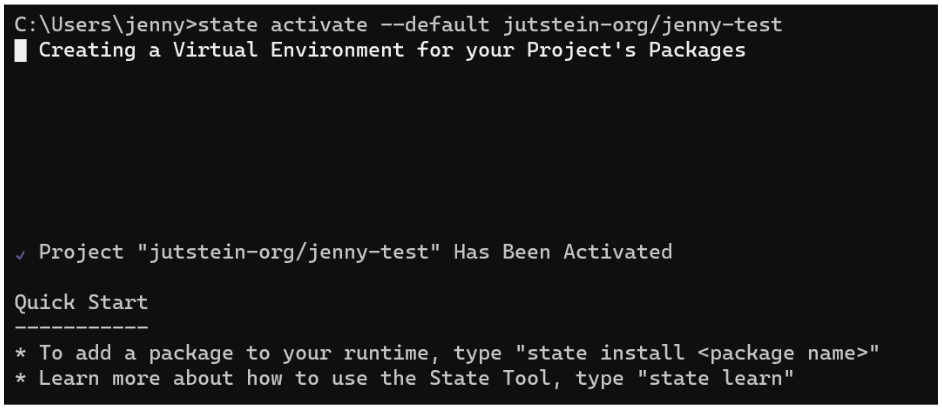
After pasting the prompt into my terminal and hitting return, it took a minute or two to download and install everything and then my project was ready to go:
Just to see if it would work, I then added a couple of new packages in my browser and ran the command “state pull” in my terminal window. As expected, my local Python environment was updated with the newly added packages and their dependencies. Pretty seamless.
Setting up Python in VS code
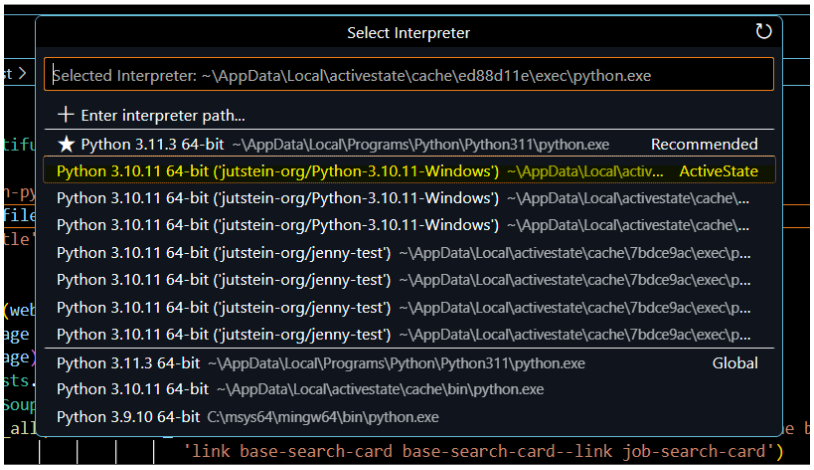
I prefer to work with Microsoft Visual Studio Code (VS Code) when I do my coding, but when I tried to use it in conjunction with my web scraper Python environment, my Python file opened in VS Code but the packages were not added. A colleague explained that I need to change the Python interpreter to be the ActiveState one, and I found steps on how to do that here. After changing the interpreter I had no more issues running my code in VS Code with no additional steps needed to set up my environment.
Now I could start working with my project, but one of the nice things about ActiveState is that they install all your projects into a virtual environment by default. This lets you install and work with multiple projects at the same time. You can see in the list of interpreters above that I had multiple Python projects/multiple versions of Python installed.
You can switch between different projects/Python environments pretty easily:
- To close the current project, you just type “exit” on the command line and it closes.
- To reopen the project I typed “state activate” on the command line, but this actually opened the most recently created project rather than the project that I had most recently opened.
- To open a specific project you can type “state activate org/project”.
- You can change the default of which project opens when you type “state activate” by typing “state activate –default org/project”.
This is the link I found that helped me figure out all these commands.
Sharing Python Projects
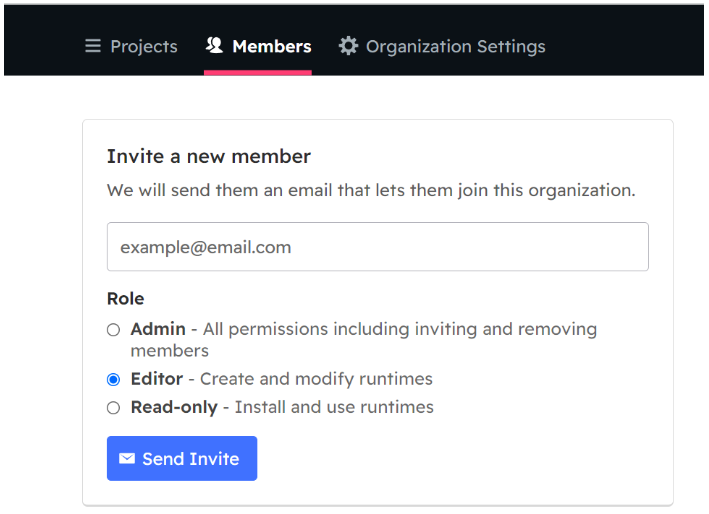
Initially, I was making good progress with my web scraper project, but I started running into a bunch of errors. I needed some help from someone more familiar with Python. Of course, ActiveState has some real experts. The easiest way to get their help was to share my project with them, which meant I had to add them to my organization.
To add someone to an organization, you just click on Organizations in the top navbar and then the Manage Members button:
I sent them an email with the link to sign up. As soon as they joined, they were able to see the projects that I had built. By copying my project’s install script into their terminal, they were able to install and use the project I had created, and then help me get things back on track.
This was a lot easier than having to explain to them how to get everything set up using pip, and it guaranteed they had exactly the same environment I was running.
Conclusions – Learn Python Quicker
Since I don’t really have a lot of experience with setting up a Python environment beyond just trying to use pip, I was surprised that ActiveState was so straightforward and intuitive. I encountered minimal issues, and was able to resolve all but one problem by myself using the platform documentation.
Overall, my experience with the ActiveState Platform was more seamless than what I was previously used to, namely trying to install projects or download packages in the terminal using pip. I would frequently find myself running into issues with the PATH of where Python was installed on my computer, or where the file I’m trying to run is located. When I was using ActiveState I didn’t encounter any of that. I didn’t ever have to change the directory I was in, or add a PATH to my computer, and I was still able to run Python using all the packages that I chose.
If you’re like me and new to Python, I highly recommend trying out the ActiveState Platform. It can help you:
- Get started MUCH more quickly
- Install all your “Learn Python” projects and switch between them (see the Similar Stories section below for some good projects to try out)
- And easily share your project with others if you get stuck
Next steps:
Sign up for a free ActiveState Platform account and see how easy it is to get started with Python for yourself.
Read Similar Stories

Learn how to use Python to visualize your stock holdings, and then build a trading bot to buy/sell your stocks with a Pre-built Trading Bot runtime.

Python tutorial – use Abstractive Text Summarization and packages like newspeper2k, PyPDF2, and SPaCy to summarize text with deep learning.
Build a blockchain in Python by following the steps explained and using the pre-built Blockchain Runtime Environment provided here.


