Before we start: This Python tutorial is a part of our series of Python Package tutorials. You can find other Tkinter related topics too!
Tkinter is the most popular way to create User Interfaces in Python. This tutorial provides you with all the information you need to understand Tkinter and how to practically apply it.
Why Tkinter for Building Python GUIs?
Tkinter is popular because it’s a simple to use yet powerful tool. It also doesn’t hurt that Tkinter is the only UI framework built into the Python standard library. Tkinter is also a cross-platform tool, rendering GUIs using native operating system elements so that applications built with Tkinter look like they belong on whatever platform that they are installed on.
While Tkinter applications may look outdated compared to those built with more complex GUI frameworks, Tkinter is comparatively lightweight and painless to code with. For a more modern look, you can take advantage of the tkinter.ttk module (which provides access to the Tk themed widget set), which, along with the ttk.Style() class gives Tkinter applications a more modern look and feel.
When it comes to coding the application, Tkinter offers a simple, event-driven structure in which applications respond to user-driven events such as a mouse-click.
This tutorial is divided into easy to understand sections, each of which begins with a comment and are numbered for reference. As long as you have a recent version of Python installed, you can follow along with the code in each section:
- Import Tkinter
- Create a container
- Define widget functions
- Design the application
- Run the application
1) Import Tkinter
We’ll use Tkinter to build a calculator application that features basic arithmetic functions. Because recent versions of Python contain both Tkinter and basic math functions on the core library, all we need to do to get started is install Python.
For Windows users:
First, install the State Tool by running the following at a Powershell prompt:
IEX(New-Object Net.WebClient).downloadString('https://platform.www.activestate.com/dl/cli/install.ps1')The State Tool will now automatically install Python 3.8 into a virtual environment for you when you run the following at a cmd prompt:
state activate --default ActiveState/ActivePython-3.8
For Linux or Mac users:
First, install the State Tool by running the following at a command prompt:
sh <(curl -q https://platform.www.activestate.com/dl/cli/install.sh)
The State Tool will now automatically install Python 3.8 into a virtual environment for you when you run the following:
state activate --default ActiveState/ActivePython-3.8
We can now go ahead and import everything from the Tkinter package:
from tkinter import *
2) Create a Tkinter Container
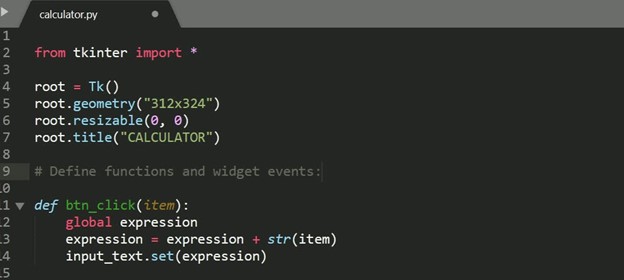
UI elements require a container/window in which they to place them. To create a root window, enter the following code, and provide a name (<any_name>) for it. You can also rename the window’s title from CALCULATOR to anything you wish.
<any_name> = Tk()
root = Tk()
# Geometry method that defines the root window size: “width x height”:
root.geometry("312x324")# Prevent root window from been resized:
root.resizable(0, 0)
# Window title:
root.title("CALCULATOR")
3) Define Tkinter Widget Functions
In this step, you’ll define what happens when a user clicks on a button in our calculator. We’ll need code that can:
- Input a number or operation on btn_click()
- Clear the input on btn_clear()
- Calculate the input on btn_equal()
# 3a. btn_click function updates the input field whenever a number is entered. Any button pressed will act as a button click update:
def btn_click(item):
global expression
expression = expression + str(item)
input_text.set(expression)
# 3b. btn_clear function clears the input field and previous calculations using the ’Clear’ button:
def btn_clear():
global expression
expression = ""
input_text.set("")
# 3c. btn_equal function calculates the expression entered in the input field.
def btn_equal():
    global expression
# eval() function evaluates the string expressions directly:
    result = str(eval(expression))
    input_text.set(result)
    expression = ""
expression = ""
# StringVar()’ is used to get the instance of the input field:
input_text = StringVar()
4) Design the Application
Now that we have the required code, we can:
- Create a frame in which to place our input field
- Create the input field, which will display the numbers and mathematical operations
- Create a frame in which to place our buttons
- Place the buttons in rows, and configure them to trigger the events defined in section 3
# 4a. Use the Frame widget to create a frame for the input field:
input_frame = Frame(root, width = 312, height = 50, bd = 0, highlightbackground = "black", highlightcolor = "black", highlightthickness = 1)
input_frame.pack(side = TOP)
# 4b. Create an input field inside the Frame created in the previous step. Output aligned to the right:
input_field = Entry(input_frame, font = ('arial', 18, 'bold'), textvariable = input_text, width = 50, bg = "#eee", bd = 0, justify = RIGHT)
input_field.grid(row = 0, column = 0)
input_field.pack(ipady = 10)
# ‘ipady’ is internal padding that increases the height of the input field.
# 4c. Create a separate Frame below the input field, which will include buttons positioned in rows inside the frame:
btns_frame = Frame(root, width = 312, height = 272.5, bg = "grey")
btns_frame.pack()
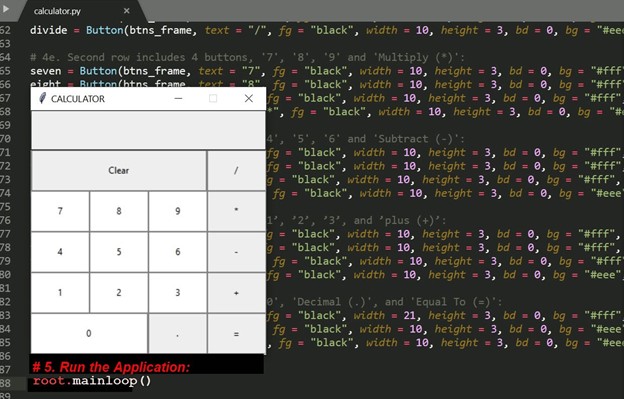
# The remainder of this section defines Button widgets arranged in 5 rows within a Frame widget. The buttons are positioned using the grid() Layout Manager. Each Button has an event that can be triggered with a mouse action configured in the previous section. E.g. btn_click()
# 4d. First row includes 2 buttons, ‘Clear (Clear)’ and ‘Divide (/)’:
clear = Button(btns_frame, text = "Clear", fg = "black", width = 32, height = 3, bd = 0, bg = "#eee", cursor = "hand2", command = lambda: btn_clear()).grid(row = 0, column = 0, columnspan = 3, padx = 1, pady = 1)
divide = Button(btns_frame, text = "/", fg = "black", width = 10, height = 3, bd = 0, bg = "#eee", cursor = "hand2", command = lambda: btn_click("/")).grid(row = 0, column = 3, padx = 1, pady = 1)
# 4e. Second row includes 4 buttons, ‘7’, ‘8’, ‘9’ and ‘Multiply (*)’:
seven = Button(btns_frame, text = "7", fg = "black", width = 10, height = 3, bd = 0, bg = "#fff", cursor = "hand2", command = lambda: btn_click(7)).grid(row = 1, column = 0, padx = 1, pady = 1)
eight = Button(btns_frame, text = "8", fg = "black", width = 10, height = 3, bd = 0, bg = "#fff", cursor = "hand2", command = lambda: btn_click(8)).grid(row = 1, column = 1, padx = 1, pady = 1)
nine = Button(btns_frame, text = "9", fg = "black", width = 10, height = 3, bd = 0, bg = "#fff", cursor = "hand2", command = lambda: btn_click(9)).grid(row = 1, column = 2, padx = 1, pady = 1)
multiply = Button(btns_frame, text = "*", fg = "black", width = 10, height = 3, bd = 0, bg = "#eee", cursor = "hand2", command = lambda: btn_click("*")).grid(row = 1, column = 3, padx = 1, pady = 1)
# 4f. Third row includes 4 buttons, ‘4’, ‘5’, ‘6’ and ‘Subtract (-)’:
four = Button(btns_frame, text = "4", fg = "black", width = 10, height = 3, bd = 0, bg = "#fff", cursor = "hand2", command = lambda: btn_click(4)).grid(row = 2, column = 0, padx = 1, pady = 1)
five = Button(btns_frame, text = "5", fg = "black", width = 10, height = 3, bd = 0, bg = "#fff", cursor = "hand2", command = lambda: btn_click(5)).grid(row = 2, column = 1, padx = 1, pady = 1)
six = Button(btns_frame, text = "6", fg = "black", width = 10, height = 3, bd = 0, bg = "#fff", cursor = "hand2", command = lambda: btn_click(6)).grid(row = 2, column = 2, padx = 1, pady = 1)
minus = Button(btns_frame, text = "-", fg = "black", width = 10, height = 3, bd = 0, bg = "#eee", cursor = "hand2", command = lambda: btn_click("-")).grid(row = 2, column = 3, padx = 1, pady = 1)
# 4g. Fourth row includes 4 buttons, ’1’, ’2’, ’3’, and ’plus (+)’:
one = Button(btns_frame, text = "1", fg = "black", width = 10, height = 3, bd = 0, bg = "#fff", cursor = "hand2", command = lambda: btn_click(1)).grid(row = 3, column = 0, padx = 1, pady = 1)
two = Button(btns_frame, text = "2", fg = "black", width = 10, height = 3, bd = 0, bg = "#fff", cursor = "hand2", command = lambda: btn_click(2)).grid(row = 3, column = 1, padx = 1, pady = 1)
three = Button(btns_frame, text = "3", fg = "black", width = 10, height = 3, bd = 0, bg = "#fff", cursor = "hand2", command = lambda: btn_click(3)).grid(row = 3, column = 2, padx = 1, pady = 1)
plus = Button(btns_frame, text = "+", fg = "black", width = 10, height = 3, bd = 0, bg = "#eee", cursor = "hand2", command = lambda: btn_click("+")).grid(row = 3, column = 3, padx = 1, pady = 1)
# 4h. Fifth row includes 3 buttons, ‘0’, ‘Decimal (.)’, and ‘Equal To (=)’:
zero = Button(btns_frame, text = "0", fg = "black", width = 21, height = 3, bd = 0, bg = "#fff", cursor = "hand2", command = lambda: btn_click(0)).grid(row = 4, column = 0, columnspan = 2, padx = 1, pady = 1)
point = Button(btns_frame, text = ".", fg = "black", width = 10, height = 3, bd = 0, bg = "#eee", cursor = "hand2", command = lambda: btn_click(".")).grid(row = 4, column = 2, padx = 1, pady = 1)
equals = Button(btns_frame, text = "=", fg = "black", width = 10, height = 3, bd = 0, bg = "#eee", cursor = "hand2", command = lambda: btn_equal()).grid(row = 4, column = 3, padx = 1, pady = 1)
5) Run the Application
Now that we’ve placed all our GUI elements and tied them to the code needed to reflect user input, it’s time to try out our calculator by running the following command:
root.mainloop()
Summary
This calculator tutorial exercises a number of common techniques that anyone working with Tkinter will need to become familiar with, including:
- Coding events that define what happens when a user interacts with a UI element
- Creating containers/windows that contain Frame widgets in which UI elements can be placed
- Using Tkinter’s Layout Manager to position Button widgets within a Frame widget
There are three Layout Managers available for Tkinter: pack(), place(), grid().
- pack() organizes widgets in horizontal and vertical boxes that are limited to left, right, top, bottom positions. Each box is offset and relative to each other.
- place() places widgets in a two-dimensional grid using x and y absolute coordinates.
- grid() arranges widgets in a two-dimensional grid using row and column absolute coordinates similar to a spreadsheet.
In addition, you can use padding (padx, pady)to modify the spacing between pack() sides, place() x,y coordinates, and grid()rows and columns. For example:
grid(row = 1, column = 2, padx = 1, pady = 1)
Button widget functions such as btn_click are positioned with grid(). For example:
command = lambda: btn_click(“/”)).grid(row = 0, column = 3, padx = 1, pady = 1)
The grid Layout Manager was chosen for the Calculator application because of its precision compared to other layout methods. After all, a calculator needs to be precise.
Get calculator.py source code here.
Next steps
Now that you know how to use Tkinter to create a calculator, let’s move on to other things you can do with Tkinter:
Get a version of Python that’s pre-compiled for Data Science
While the open source distribution of Python may be satisfactory for an individual, it doesn’t always meet the support, security, or platform requirements of large organizations.
This is why organizations choose ActivePython for their data science, big data processing and statistical analysis needs.
Pre-bundled with the most important packages Data Scientists need, ActivePython is pre-compiled so you and your team don’t have to waste time configuring the open source distribution. You can focus on what’s important–spending more time building algorithms and predictive models against your big data sources, and less time on system configuration.
Some Popular Python Packages for Data Science/Big Data/Machine LearningYou Get Pre-compiled – with ActivePython
- pandas (data analysis)
- NumPy (multi-dimensional arrays)
- SciPy (algorithms to use with numpy)
- HDF5 (store & manipulate data)
- Matplotlib (data visualization)
- Jupyter (research collaboration)
- PyTables (managing HDF5 datasets)
- HDFS (C/C++ wrapper for Hadoop)
- pymongo (MongoDB driver)
- SQLAlchemy (Python SQL Toolkit)


