One of the secret ingredients of practical software engineering is to ensure the solutions are simple and small. That’s essentially what the hype around serverless implementations is all about since serverless applications scale automatically with demand and remove the maintenance burden from developers. Of course, since it’s all automated, you’re going to lose some control and visibility, but the time and effort savings are hard to argue with.
In this article, we’re going to use Python and Amazon Web Services (AWS) Lambda to implement a simple REST API by doing the following:
- Create a Lambda function using Python
- Connect the Lambda function to AWS API Gateway and AWS DynamoDB
- Managing access to the function with AWS Identity & Access Management (IAM) policies
In the quest for simplicity, we’ll use AWS CloudFormation to define as much of this process as possible.
Recall that a REST API is simply a way to store and retrieve information with stateless protocols. In this case, our REST API is going to handle information about people’s pets. To create it, we’ll:
- Implement a POST endpoint to submit pet information to the API
- Enable a GET endpoint to retrieve pet information
- Use an AWS DynamoDB table to store pet information
Here’s our implementation plan:
- Define the REST API
- Set up the serverless infrastructure
- Code the Lambda functions
- Create the API gateway
- Deploy and test the API gateway
Python and AWS Lambda – Overview
Just in case you’re new to AWS or their serverless platform known as AWS Lambda, let’s run through a quick overview:
- Why AWS Lambda? The Lambda platform allows you to create and configure a function that runs in the AWS environment. An overwhelming benefit of these functions is that you only pay for the resources needed to execute the function, making them an attractive option for organizations looking for a scalable and cost-effective way to add cloud functionality.
- How to Create a Lambda Function:
- Create a handler function where we can provide the code. The handler accepts JSON formatted input and returns the same.
- Specify the runtime environment (ie., the version of Python to use)
- Define a trigger that invokes the function. For this example, we’re going to create two Lambda functions.
- Because Lambda functions are stateless, we’ll create a DynamoDB table to store the information between requests.
- We’ll also need to create an IAM role that allows our Lambda functions to access the DynamoDB table.
You can find all of the code for this project in my GitHub repo. The repo includes an API document and a CloudFormation template that will make it easier to get everything running in your AWS account.
If you don’t already have an AWS account, you can sign up for a free tier account here. There shouldn’t be any charges to run this example in the free tier, and the CloudFormation approach makes it easy to delete everything when you’re done.
1 — Define a REST API
Our API will store the following information:
- Pet’s name
- Breed
- Gender
- Birthday
- Owner’s name
- A unique identifier for each pet
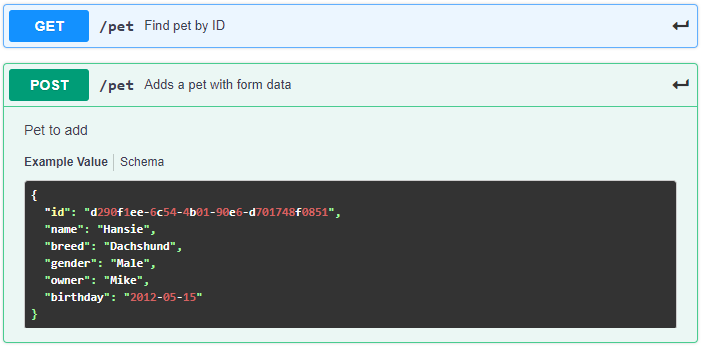
You can view the API in my GitHub repo (see API.json), or you can just view it alongside the interactive documentation for it in the SwaggerHub repo. The API defines two endpoints:
- A GET endpoint, which allows us to find a pet using the unique identifier
- A POST endpoint, which enables us to add new pets to our Dynamo database
2 — Set Up the Serverless Infrastructure
We’ll use a CloudFormation (CF) template to set up the infrastructure for this example. You have two choices:
- If you want to follow along, you’ll need to log in to your AWS account and create the CF stack from the CloudFormation home page. AWS provides good instructions for creating a new CloudFormation stack here.
- Or you can use my CloudFormation.json CF template
If you want to create your own, you can:
- Select Create stack and choose the Upload a template file option
- Selecting the template file and click Next
- Name the new stack PetsAPI or something similar and then click Next
- Keep all the default options on the Configure stack options page and click Next
- At the bottom of the Review page, check the option to allow CloudFormation to create an IAM role.

It should only take a minute or two to create all the elements of the new stack. If you’d prefer to provide the infrastructure manually, you’ll need to create:
- A DynamoDB table named “Pets” with a primary key named id.
- An IAM Role that grants a Lambda function with permission to:
- Write and read from the “Pets” table
- Create log groups, a log stream and write log events
- Two Lambda functions, one for the GET operation, and one for the POST operation.
- Set the runtime to Python 3.7
- Configure the function to use the IAM role you created.
Now that we’ve created the infrastructure, we’ll edit the code in each of the Lambda functions to handle adding and retrieving pet objects from the database table.
3 — Code the Lambda Functions
On the AWS console, navigate to the Lambda home page where you should see the two functions we created previously.
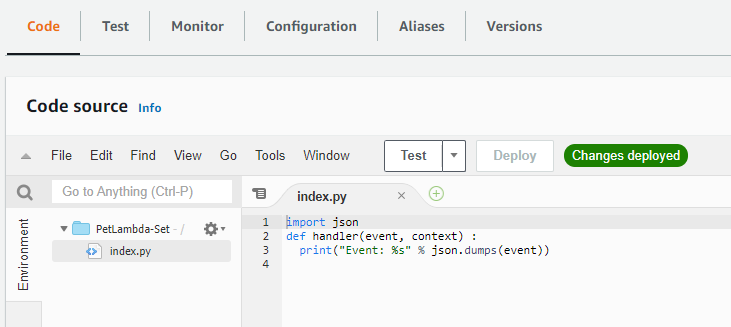
Let’s start by implementing the POST endpoint. If you set up your infrastructure with the CF template, the function is called PetLambda-Set.
- Select the function name to edit it
- Navigate to the Code tab below the function overview
- Select index.py to view the code for the Lambda:
We’re going to use the boto3 library, which provides the AWS SDK for Python. We’ll keep the code simple for now, but you could experiment with adding validations and exception handling. Using boto3, we’ll connect to the DynamoDB table and insert a new record. If you’re following along, copy the code below, and replace the Lambda code with it:
import boto3
def lambda_handler(event, context):
   client = boto3.resource('dynamodb')
   table = client.Table('Pets')
   response = table.put_item(
	       Item={
	           'id': event['id'],
           'name': event['name'],
           'breed': event['breed'],
           'gender': event['gender'],
           'owner': event['owner'],
           'birthday': event['birthday']
       }
   )
   return {
	       'statusCode': response['ResponseMetadata']['HTTPStatusCode'],
       'body': 'Record ' + event['id'] + ' added'
   }
If you want to test the Lambda function, Select the Test tab, create a new test from the hello-world template, and use the example dataset shown below:
{
  "id": "d290f1ee-6c54-4b01-90e6-d701748f0851",
  "name": "Hansie",
  "breed": "Dachshund",
  "gender": "Male",
  "owner": "Mike",
  "birthday": "2012-05-15"
}
The response should look similar to that shown below:
{
  "statusCode": 200,
  "body": "Record d290f1ee-6c54-4b01-90e6-d701748f0851 added"
}
Now let’s follow the same steps to update the PetLambda-Get function. The code below:
- Connects to the DynamoDB table
- Creates a query using a key composed of the id
- Returns either the pet object or an HTTP 404 Not found error
import boto3
def lambda_handler(event, context):
   client = boto3.resource('dynamodb')
   table = client.Table('Pets')
   response = table.get_item(
	       Key={
	           'id': event['id']
       }
   )
   if 'Item' in response:
       return response['Item']
   else:
       return {
	           'statusCode': '404',
           'body': 'Not found'
       }
You can test this Lambda by sending in the following test data:
{
  "id": "d290f1ee-6c54-4b01-90e6-d701748f0851"
}
4 — Create the API Gateway via AWS Console
With our two Lambda functions created and connected to the database, it’s time to add an API Gateway to expose the API functionality. On the AWS Console, navigate to the API Gateway home page and select the Build option to create a REST API:
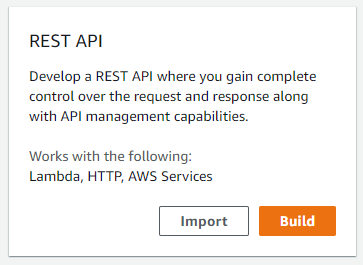
At this point, you can:
- Manually set up your API using the Build button
- Import the configuration from a Swagger File or Open API 3 file
Let’s do the following:
- Click the Import button and select the Import from Swagger or Open API 3 option
- Click the Select Swagger File button.
- My GitHub code repository contains a file named API.json. Choose that file, and select Import. After the import process has finished, you should see the pet resource defined with a GET and a POST resource endpoint:
Now we’ll connect the GET and POST endpoints to each of our Lambda functions:
- Click Set up now for the POST endpoint first.
- Set the Integration type to Lambda Function. The region is the same one where you defined your functions.
- Type PetLambda-Set into the Lambda Function field and select Save.
- AWS automatically adds permissions for the API Gateway to call your function so all you need to do is select OK at the prompt.
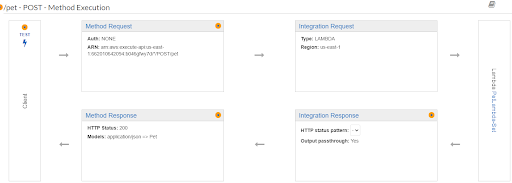
- Test the POST endpoint by selecting the Test option on the client block and entering the original dataset that we used to test the Lambda function above. The POST endpoint accepts a Request Body in JSON format by default:
Configuring the GET endpoint is similar, although we’ll need to configure a way to map the query string to the Lambda parameters:
- Click Set up now for the GET endpoint.
- Set the Integration type to Lambda Function. The region is the same one where you defined your functions.
- Type PetLambda-Get into the Lambda Function field and select Save.
- AWS will prompt you again to add permissions for the API Gateway to call your function, so click OK.
- Select the Method Request box
- Under URL Query String Parameters add a query string named id, and mark it as required.
- Click the checkmark to save it.
- Select Method Execution to return to the main configuration page for the GET endpoint.
- Select the Integration Request box.
- Under Mapping Templates, select When there are no templates defined (recommended).
- Select the option to Add mapping template.
- Set the Content-Type to application/json and select the checkmark to save the value.
In the Generate Template box, paste the following:
{
  "id":  "$input.params('id')"
}
This configuration will map the query string parameter to an input parameter for the Lambda. Click Save when you’re done.
5 — Deploy and Test API Gateway
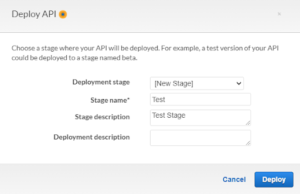
Okay, time to deploy our API and make sure everything is set up and working properly. From the main screen for your API, click on Actions, and choose Deploy API.
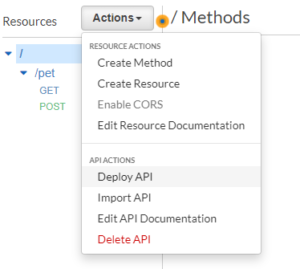
Choose [New Stage] from the Deployment stage dropdown, and then enter a name (such as Test) and a description. Click Deploy when you’re done.
AWS will now deploy your API and make it available to be invoked on the Web. You’ll find a custom URL at the top of the page, and options below to enable throttling and various security options.
Copy the URL to your browser and add /pet?id=d290f1ee-6c54-4b01-90e6-d701748f0851 to the end of it. If you followed this example and tested your Lambda with the data set I provided, you should see the JSON object returned in your browser.
You can also use PostMan, Insomnia, or other API tools to post different datasets to the endpoint. You’ll need to add /pet to the end of the URL provided for you.
Python and AWS Lambda – Wrapping Up
Remember that AWS charges you for everything that’s running on your account, so when you’re done with the example in this post, don’t forget to clean up the API, Lambdas, and other infrastructure. The simplest way is:
- On the API Gateway home page, select the API Gateway you created, and choose Delete from the Actions dropdown.
- From the CloudFormation home page, select the stack you created and click on the Delete option at the top of the page.
- AWS should remove everything within a few minutes.
If you’d like to learn more about Amazon’s API Gateway, the Developer Guide is an excellent place to start. As you can see from the example above, if you have an API document, it doesn’t take much to provision Lambda functions and configure them behind an API gateway.
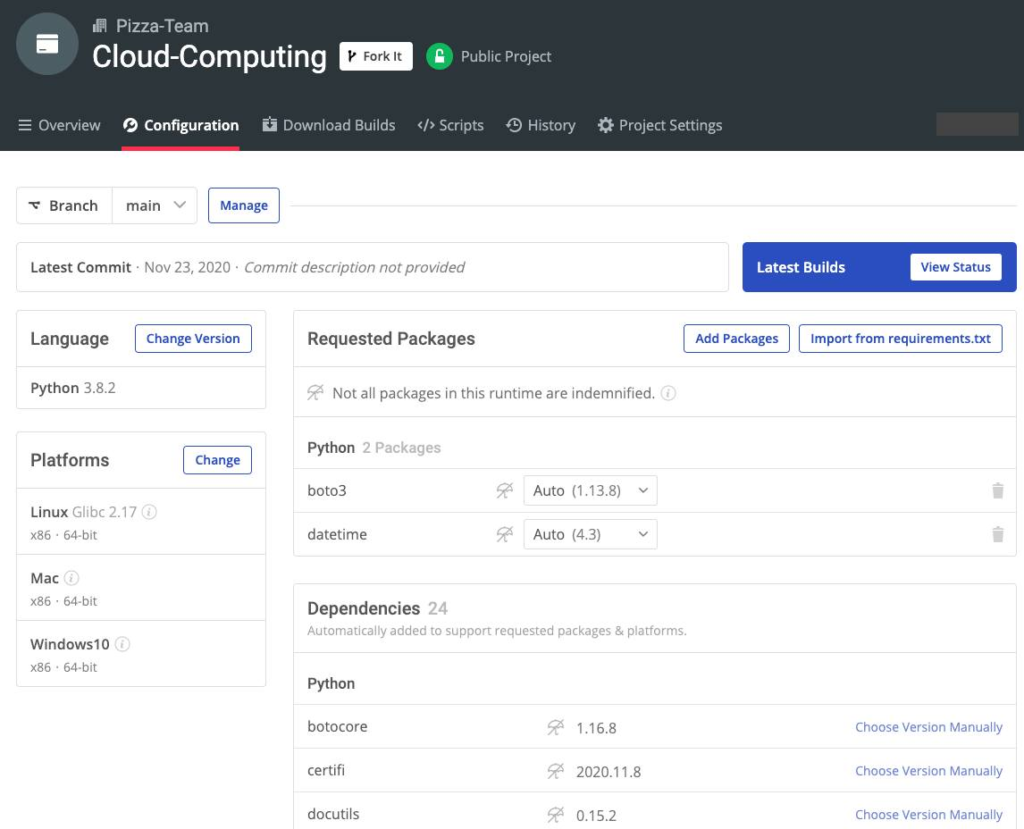
If you want to explore more of what you can do with Python and AWS Lamda, try our pre-built Cloud Computing Python Environment for Windows, Mac and Linux.
It bundles up Python 3.8.2 and boto3 so you can just install it and start driving your AWS implementation using Python right away!
- Need a pre-compiled, ready-to-deploy version of Python? Get ActivePython
- Still using Python 2? Get extended support


