By default pip installs third party packages from the Python Package Index (PyPI). In corporate environments located behind a firewall, you may require the use of an HTTP proxy server to redirect internal traffic to pypi.org, or any other repository that hosts Python packages.
What is a Virtual Python Shell?
A virtual Python shell is used to execute commands and compile Python code in a virtual environment on your local machine.
Why Use a Python Virtual Environment
A Python virtual environment is a local installation (as opposed to global installation) that has its own directory system (including site-packages), Python interpreter, and shares the standard Python library. Virtual environments allow you to run multiple Python projects and/or multiple versions of Python on the same local system without worrying about dependency conflicts between installations.
Ways to Create Virtual Python Shell Environments
Python has many different ways to create virtual environments, each with its own pros and cons. Which one you should use depends on your individual project needs:
- venv – built into the Python standard library since v3.3, venv provides support for creating and managing virtual environments. You’ll still need to use pip to install and manage packages, though.
- virtualenv – a third party package introduced in Python 2, which is a more full-featured version of venv, but you’ll still need pip to manage packages.
- pyenv – Python version manager that lets you change the global Python version, install multiple local Python versions, set directory-specific or project-specific Python versions, and create and manage virtual environments. Still need pip though.
- pipenv – effectively combines pip+venv into a single tool that lets you create virtual environments with whatever Python version you want, and then install and manage packages therein.
- ActiveState Platform – package management solution that automatically creates Python runtimes environments and installs them in virtual environments. Replace pip with State Tool for installing and managing packages.
Create a Virtual Environment Shell with Venv
Venv and virtualenv have similar features and command structure, but venv has fewer options. To see all venv options, enter:
python -m venv -h
If you are working with Python 3.8 or later, you can create a virtual environment shell by doing the following:
- cd into the directory where you would like to create your project
- Enter python -m venv <project_name>
If you are working with Python 3.7 or earlier, you can create a venv virtual environment by doing the following:
- Cd into the directory where you would like to create the project
- Enter python -m virtualenv venv <project_name>
Note that Venv automatically installs pip into Python 3.4+ virtual environments.
Create a Virtual Environment Shell with Virtualenv
Virtualenv has been deprecated in Python 3.8. However, it has more features than its successors (venv and pipenv), and can be useful in certain low level conditions with Python scripts. Virtualenv can be implemented in Python 2.7 and 3+, and now provides additional virtualenvwrapper commands that makes it much easier to use.
Virtualenv advantages compared to venv:
- More extensible since it has a richer programmatic API.
- Can create a new virtual environment for an arbitrarily installed version of Python, and automatically discover it.
- Upgradeable with pip.
- -p flag option enables the globally installed Python interpreter to be used within the virtual environment.
To install virtualenv, run the following command:
python -m pip install virtualenv
To create and then activate a virtual environment with virtualenv, enter the following:
Linux:
python -m virtualenv ~/<proj_name>
Windows:
python -m virtualenv c:<proj_name>
Virtual environment activation:
Linux:
cd ~/<proj_name>
. bin/activate
Windows:
cd<proj_name>
activate
Activating a virtual environment sets it as the default version of Python used by your system.
To deactivate a virtual environment once your work is complete, enter:
deactivate
Create a Virtual Environment Shell with Pyenv
Pyenv is a high level Python version manager that can be used to:
- Change the global Python version
- Install multiple local Python versions
- Set directory or project specific Python versions
- Create and manage virtual environments
Note that pyenv is a Linux only bash extension, and will not work on Windows or Mac OS X.
For information about Pyenv, refer to: Dependency Management with Virtual Environments
Create a Virtual Environment Shell with Pipenv
Pipenv is a tool for managing dependencies and workflow in virtual environments. It uses pip and virtualenv underneath, and simplifies their usage with a single command line syntax. Like venv, pipenv automatically creates a separate virtual environment for each project.
Pipenv can be installed with the following command:
python -m pip install pipenv
To install, upgrade or uninstall packages using pipenv, just replace the pip command with pipenv. For example, the following command installs a specific package from PyPI:
pipenv install <package_name>
You can also install packages from locations other than PyPI. For example, to install a specific package from a Github repository, enter:
pipev install -e git+https://github.com/<owner_name>/<repo_name>.git#egg=<repo_name>
To activate the virtual environment, navigate to your project directory and enter:
pipenv run <command>
For more information about Pipenv, refer to: Dependency Management with Virtual Environments
Create a Virtual Environment Shell with ActiveState Platform
Keep your projects sandboxed on your machine with a cross-platform, universal virtual environment solution that’s quicker and easier to use than venv, but still lets you run multiple versions of Python on your machine without worrying about dependency conflicts.
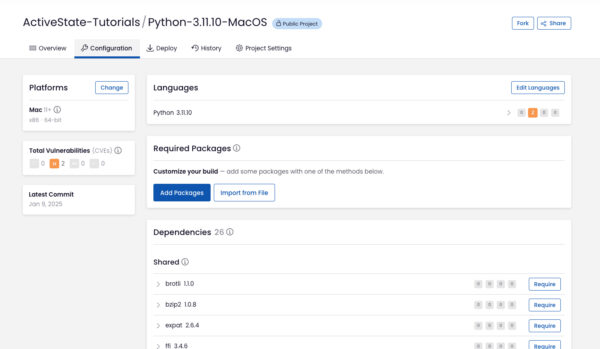
The ActiveState Platform automates the building of Python runtime environments from source code, and then installs them into virtual environments by default. You can either create a complete environment for your project in the Web GUI, or else use the State Tool to state install <package_name> or state import <requirements.txt>
The ActiveState Platform will automatically resolve all dependencies if it can, and flag unresolvable conflicts so you can work around them by pinning problematic dependencies and sub-dependencies.
The ActiveState Platform also includes virtual environment management. To list all locally installed environments, run:
state projects
To switch between projects, run:
state activate <project_name>
To get started, install a recent version of Python by ActiveState.
Python by ActiveState In Action
Get a hands-on appreciation for how the ActiveState Platform can help you manage your dependencies for Python environments. Just run the following command to install Python 3.9 and our package manager, the State Tool:
Windows
powershell -Command "& $([scriptblock]::Create((New-Object Net.WebClient).DownloadString('https://platform.www.activestate.com/dl/cli/install.ps1'))) -activate-default ActiveState-Labs/Python-3.9Beta"
Linux
sh <(curl -q https://platform.www.activestate.com/dl/cli/install.sh) --activate-default ActiveState-Labs/Python-3.9Beta
Now you can run state install <packagename>. Learn more about how to use the State Tool to manage your Python environment.
Let us know your experience in the ActiveState Community forum.
Watch this video to learn how to use the ActiveState Platform to create a Python 3.9 environment, and then use the Platform’s CLI (State Tool) to install and manage it.
Related Links


