This blog is part of my ongoing Continuous Integration/Continuous Delivery (CI/CD) series. This time we’ll shine our spotlight on Microsoft’s CI/CD offering, which is part of their Azure Cloud family. Microsoft offers both on premise and cloud CI/CD services, and has different licensing plans for each:
- The on premise option is the Azure DevOps Server (formerly known as Team Foundation Server), which supports various application development lifecycle features including SCM, build and test automation, release management, and even requirements and project management capabilities.
- The new cloud-native version is Azure DevOps Services, which has a GitLab/Jenkins style “Runner” concept that allows you to choose where to “run” the service – on your own infrastructure, or else hosted on Azure. The main CI/CD functionality is branded Azure Pipelines. There’s also a binary package repository similar to Artifactory called Azure Artifacts where you can store your Perl and Python packages and artifacts.
In this post, I’ll explain how to set up a CI/CD pipeline on Azure Pipelines for a Python project that incorporates:
- Pipeline Configuration – typically a YAML config file
- Source Code – a simple Python project on GitHub (also works with Perl projects just as well)
- Runtime – an ActiveState Python runtime environment and tooling (also works with Perl runtimes)
Note that Azure Pipelines has had some troubles in the past maintaining a working Python environment because (like most CI/CD vendors) they don’t precompile and verify the runtime. The ActiveState Platform is designed to solve this problem both for CI platforms and production deployments. The ActiveState Platform CLI, the State Tool will be utilized to pull down a pre-built custom runtime environment, which includes a version of Python, as well as all the packages and dependencies the project requires.
Azure DevOps Overview
As is typical of Microsoft’s Enterprise offerings, the Azure DevOps management hierarchy is based on users and their memberships/rights. A user can be a member of multiple organizations, including a “personal organization”, which might have different rights and features/limitations than their corporate organization. Projects are created under organizations, and will require some basic options to be selected.
- Login – as usual with Microsoft’s Cloud-based tools, you will need a Microsoft account to be able to access the Azure Pipelines feature provided by Azure DevOps Services. Note that you may want to link your GitHub account during sign in, if you have one.
- Projects – once logged in, you can create your first project, or select an existing one in an organization you might already be a member of.
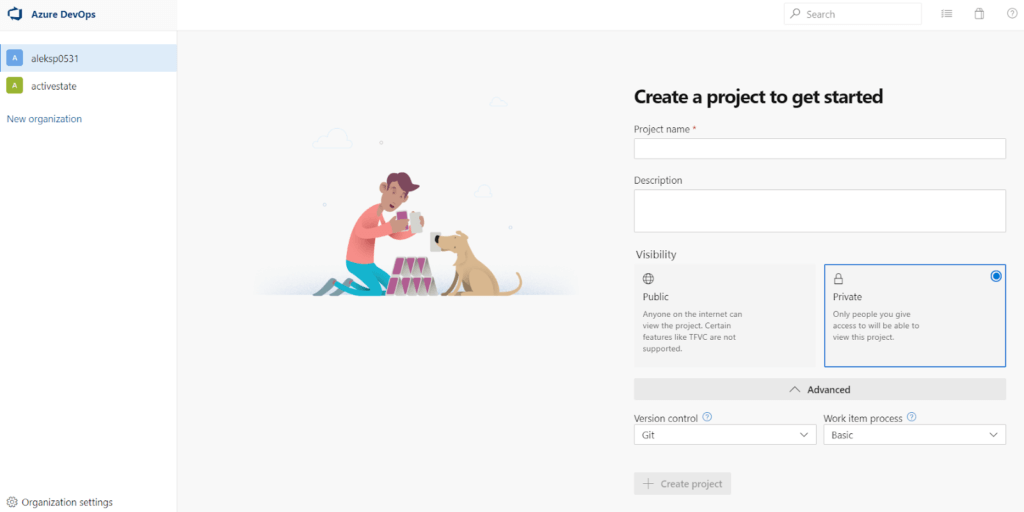
Other than project name and description, you will need to set project visibility to Public or Private (similar to ActiveState Platform projects). Microsoft also provides options for Version Control (Git or legacy support for Team Foundation), as well as a way to link Azure DevOps to a software development process your team might be following.
- Pipelines – Once your project has been created, you’ll see the main “Pipelines” sidebar on the left and a “New Pipeline” screen guiding you to set up your project. The Azure Pipelines sidebar has a similar look-and-feel to GitLab, and features similar high-level functionality for creating pipelines as well as deployment environments, releases and other related DevOps services.
- Pipeline Configuration – There are two main methods of creating pipeline configurations supported in Azure Pipelines:
- Legacy Team Foundation – This is based on the “classic editor” from Microsoft’s Team Foundation product, and mostly there for supporting older installations and migrations.
- YAML – This is the default option that uses .yaml-based configuration, which is common among almost all CI vendors.
When starting up a new project, Azure Pipelines will try to detect your project type (after getting access to the source code), and offer you suitable defaults from a list of stock configurations it has for common language, framework and deployment configurations.
But you can also create a YAML file yourself by starting with one of the examples and editing it in the quite helpful editor. The editor has built-in “Tasks” on a pane on the right hand side, which are pre-packaged scripts for commonly used tasks that you can easily insert into the YAML file. There’s also support for variables, which are used to store values or secrets that can be used in the pipeline configuration.
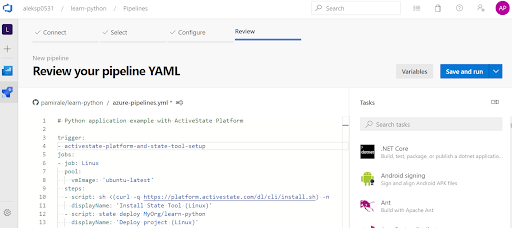
It will take a while to learn all the available features and be able to use the full power of the Pipeline scripting, but Azure Pipelines makes it quite easy to get started with its wizard-like interface.
Getting Started with Azure Pipelines
Now that you have some feel for the Azure DevOps service and its Pipelines feature, all you need to do to get started is:
- Sign up for a free ActiveState Platform account.
- Check out the runtime environment for this project located on the ActiveState Platform.
- Check out the project’s code base hosted on Github, and fork it into your GitHub account.
All set? Let’s dive into the details.
Setting up Azure Pipelines for your Project
To start, let’s create a project in Azure Pipelines:
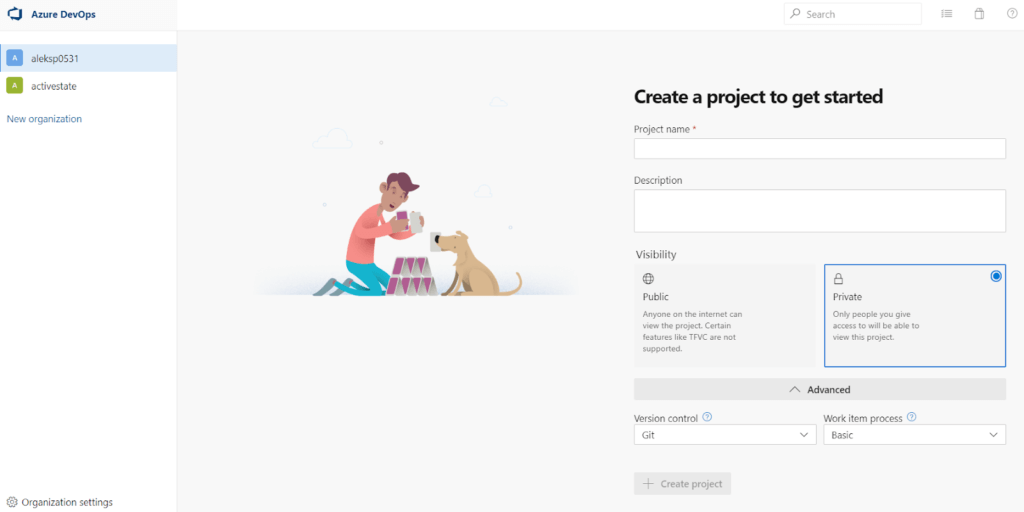
1) Log into Azure DevOps and create a new project.
2) Choose the GitHub option, and authorize Azure Pipelines to access your GitHub account. In actual use of Azure Pipelines this authorization process could be complicated depending on the type of project you’re building and the type of organization you’re in (especially if in an organization already using Azure services and managed by a different group), so you might want to refer to their product documentation to decide which type of authentication you should choose.
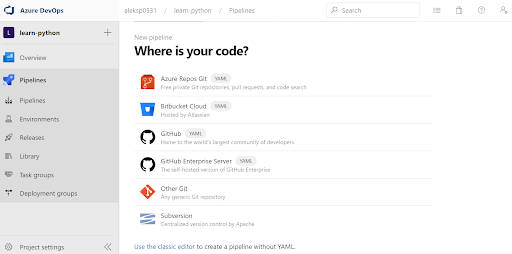
3) Select the repository you forked and “Approve and Install” the Azure Pipelines app on Github.
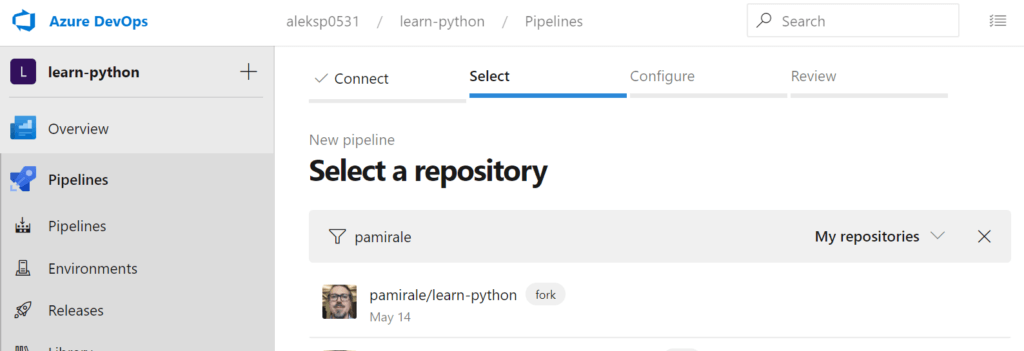
4) Azure Pipelines will try to detect your application and offer a configuration suitable for it.
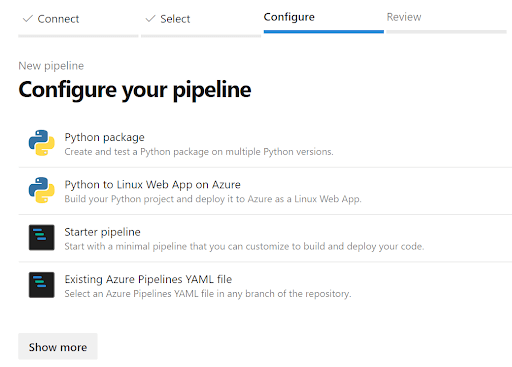
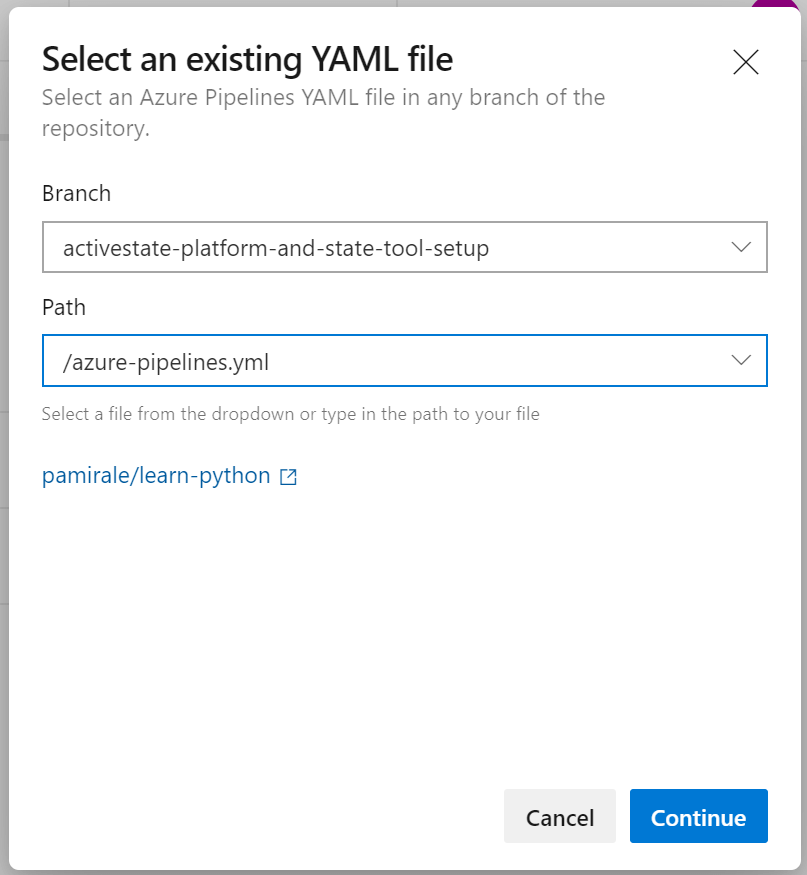
5) In our case, we’ll just select “Existing Azure Pipelines YAML file”, and select azure-pipelines.yml
6) In the next screen you can review the YAML file and then click Run to start the job.
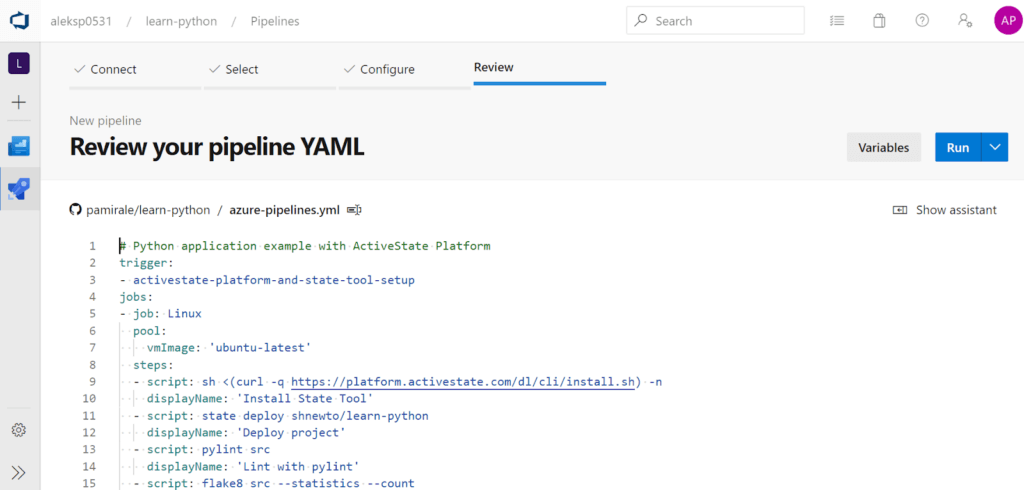
Let’s pause here for a moment and have a closer look at the pipeline configuration:
# Python application example with ActiveState Platform
trigger:
- activestate-platform-and-state-tool-setup
jobs:
- job: Linux
  pool:
    vmImage: 'ubuntu-latest'
  steps:
  - script: sh <(curl -q https://platform.www.activestate.com/dl/cli/install.sh) -n
    displayName: 'Install State Tool'
  - script: state deploy ActiveState-Labs/learn-python
    displayName: 'Deploy project'
  - script: pylint src
    displayName: 'Lint with pylint'
  - script: flake8 src --statistics --count
    displayName: 'Lint with flake8'
  - script: pytest
    displayName: 'Test with pytest'
- job: macOS
  pool:
    vmImage: 'macOS-latest'
  steps:
  - script: sh <(curl -q https://platform.www.activestate.com/dl/cli/install.sh) -n
    displayName: 'Install State Tool'
  - script: state deploy --force ActiveState-Labs/learn-python
    displayName: 'Deploy project'
  - script: pylint src
    displayName: 'Lint with pylint'
  - script: flake8 src --statistics --count
    displayName: 'Lint with flake8'
  - script: pytest
    displayName: 'Test with pytest'
- job: Windows
  pool:
    vmImage: 'windows-latest'
  steps:
  - powershell: |
      (New-Object Net.WebClient).DownloadFile('https://platform.www.activestate.com/dl/cli/install.ps1', 'install.ps1')
      Invoke-Expression -Command "$env:PIPELINE_WORKSPACE\install.ps1 -n -t $env:AGENT_TOOLSDIRECTORY/bin"
      Write-Host "##vso[task.prependpath]$env:AGENT_TOOLSDIRECTORY\bin"
    workingDirectory: $(Pipeline.Workspace)
    displayName: 'Install State Tool'
  - script: |
      state deploy ActiveState-Labs/learn-python --path %AGENT_TEMPDIRECTORY%
      echo ##vso[task.prependpath]%AGENT_TEMPDIRECTORY%\bin
      echo ##vso[task.setvariable variable=PATHEXT]%PATHEXT%;.LNK
    displayName: 'Deploy project'
  - script: pylint src
    displayName: 'Lint with pylint'
  - script: flake8 src --statistics --count
    displayName: 'Lint with flake8'
  - script: pytest
    displayName: 'Test with pytest'
The Azure Pipelines configuration is straightforward on the surface, but it takes some time to get a multi-platform build set up properly. Our example here uses -jobs, which sets up Linux, macOS, and Windows jobs running on VMs, and executes them in parallel if resources are available. Each job has a name, a pool, which defines the VM image being used, and a number of steps, which are individual scripts that will be executed in sequence using different shells on each VM.
The only global setting in our example pipeline configuration is the trigger, which contains a branch name off of our GitHub project. Any update in this branch will kick off the execution of this pipeline. More complicated triggers can also be set up for different use cases.
For each job, the steps are conceptually doing the same thing, but with some differences to overcome OS-specific issues:
- The first script in each step installs the State Tool, which will allow us to deploy our pre-built ActiveState runtime directly into the VM. Linux and Mac steps are similar, but installing the State Tool on Windows requires PowerShell at the moment. In each case, the installer script is downloaded, and then executed with parameters to install it into the
AGENT_TOOLSDIRECTORYwhich is Azure Pipeline’s custom tools directory location accessed through an Azure Pipelines variable.- We also use an Azure Pipelines trick to add the State Tool installation directory to the PATH, so we can use it in following steps.
- The next script provides for downloading the Python runtime environment from the ActiveState Platform and installing it on the VM via the
state deploycommand. This method creates a global, system-wide installation of Python.- For Mac, we use an optional flag –force to replace the symlinks to the pre-installed Python on the VM.
- For Windows, we again use the PATH trick to add the Python executables to the path, as well as another trick to modify the PATHEXT variable in order to make sure later steps pick up the right executables.
- The remaining three scripts are the same for all platforms, and just execute the linting and testing commands for the project.
7) When you run the pipeline, you’ll see a Summary screen with details of your Pipeline and its scheduled jobs.
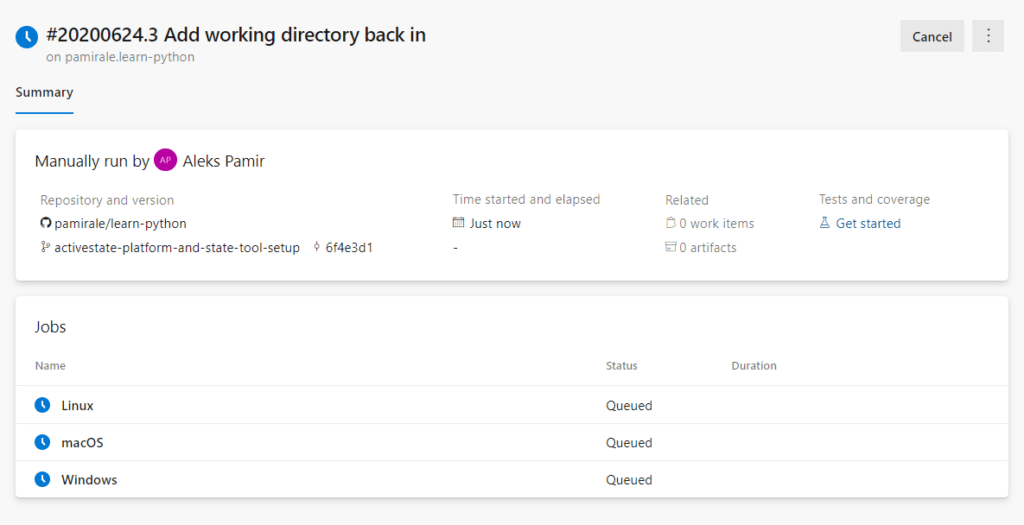
After some time, the tasks should finish executing and complete successfully. At any time during this period, you can click on the job names to see detailed information about each job and its steps. You can also click on the step names to see live logs for each step.
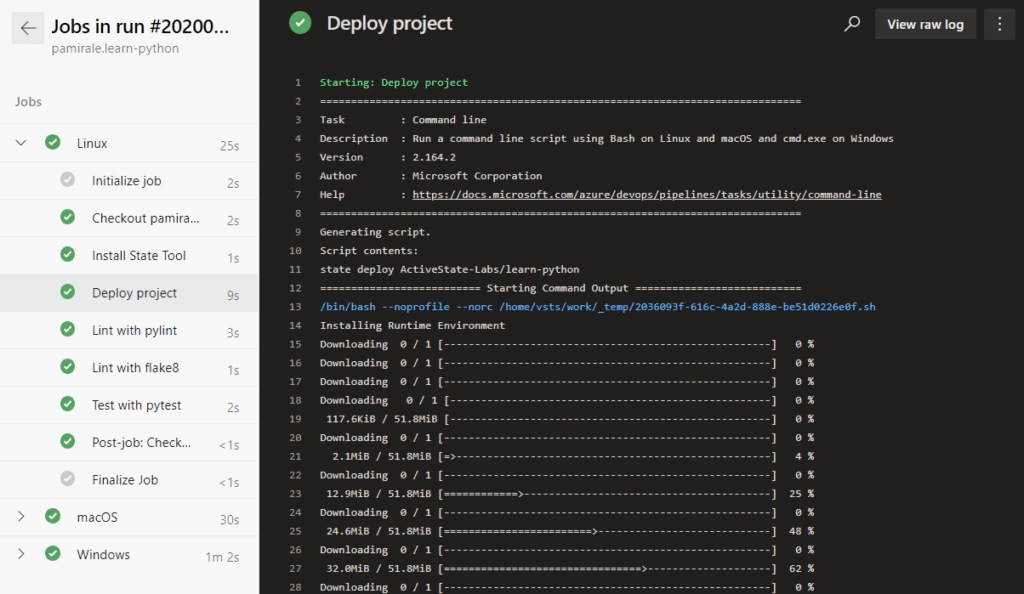
8) Any update you make to your trigger (e.g. commits to the branch) will automatically run the pipeline.You can access the logs for each run from the Pipelines screen, which you can navigate to by clicking on the Pipelines folder.
Conclusions
Even though Microsoft has existing solutions for build and source code management, enterprise adoption of the cloud has driven the need for a CI/CD solution on Azure. But when it comes to services from the big cloud vendors (Amazon, Microsoft, Google, etc.), CI/CD is treated as “just another service” rather than being a focus as it is for CI/CD-as-a-product companies (e.g. Travis or Circle CI). Azure Pipelines suffered from this lack of focus in its initial release. For example:
- Microsoft chose to port some components of the on prem Team Foundation functionality to the cloud, resulting in similar looking but differently used functionality. The release caused confusion for both development teams and users alike.
- Compared to other solutions, the breadth of functionality was limited.
- The implementation was inconsistent and unstable.
Even though Azure Pipelines has improved over time, some of these issues still exist. Stability of builds is of particular concern, which may be a result of the large amount of options and freedom provided in creating pipeline scripts rather than anything due to the underlying cloud infrastructure.
As for feature/functionality, Azure Pipelines now ticks all the required boxes, including multi-platform support. The pipeline configuration script is good, but compromised by the fact that you have to resort to some obscure commands to achieve continuity between steps. Note that this is not unique to Azure – we’ve also seen the same in Google Cloud Build. This is probably the price that needs to be paid in order to achieve the kind of scalability these systems offer, but it doesn’t make an end user’s life any easier. Regardless, Microsoft still sees CI/CD as an important part of their DevOps tools portfolio, and continues to improve integration with the rest of their Azure cloud offerings.
Azure Pipelines is a good option for users that require CI/CD for their Windows applications, or their cross-platform applications that also need Windows support. Being integrated into the Azure Cloud ecosystem provides advantages to corporate users who have already invested in Azure, especially in terms of security and access control. Note that Azure Pipelines is not as tightly integrated with Azure as Google Cloud Build is with GCP, so using it outside the Azure ecosystem still provides end users with full functionality.
One of the key decision criteria when choosing between CI/CD solutions is the ability to integrate with an organization’s existing toolchains and processes. Azure Pipelines provides basic support “out of the box”, but is also quite extendable and flexible. But with flexibility comes complexity. As a result, integrating Azure Pipelines with any reasonably sophisticated software development workflow can be both complex and costly.
The ActiveState Platform, in conjunction with the State Tool, simplifies development workflow and CI/CD setup by providing a consistent, reproducible environment deployable with a single command to developer desktops, test instances and production systems. In contrast to the Docker approach to environment consistency and reproducibility, which is based on IT requirements, ActiveState offers a developer-friendly way of synchronizing environments across dev, CI/CD and production systems and can support both container-based as well as VM-based CI/CD systems.
As a result, the ActiveState Platform simplifies the setup of a more secure, consistent, up-to-date CI/CD pipeline. Additionally, since the ActiveState Platform builds all runtime packages and dependencies from vetted source code, binary artifacts can be traced back to their original source, helping to resolve the build provenance issue.
- If you’d like to try it out, sign up for a free ActiveState Platform account where you can create your own runtime environment and download the State Tool.
Related Blogs:
Solving Reproducibility & Transparency in Google Cloud Build CI/CD Pipelines


