Software Supply Chain Security
Secure Open Source, From Source to Deployment
ActiveState builds every component from original source code, eliminating the trust gap between public registries and your production environment.
Public registries distribute risk
npm, PyPI, DockerHub, and every other public registry distribute pre-compiled binaries with no guarantee of integrity. Typosquatting, dependency confusion, and malicious packages are growing attack vectors. If you're pulling directly from a public registry, you're inheriting the entire chain of custody for code you didn't write.
%20(1).webp)
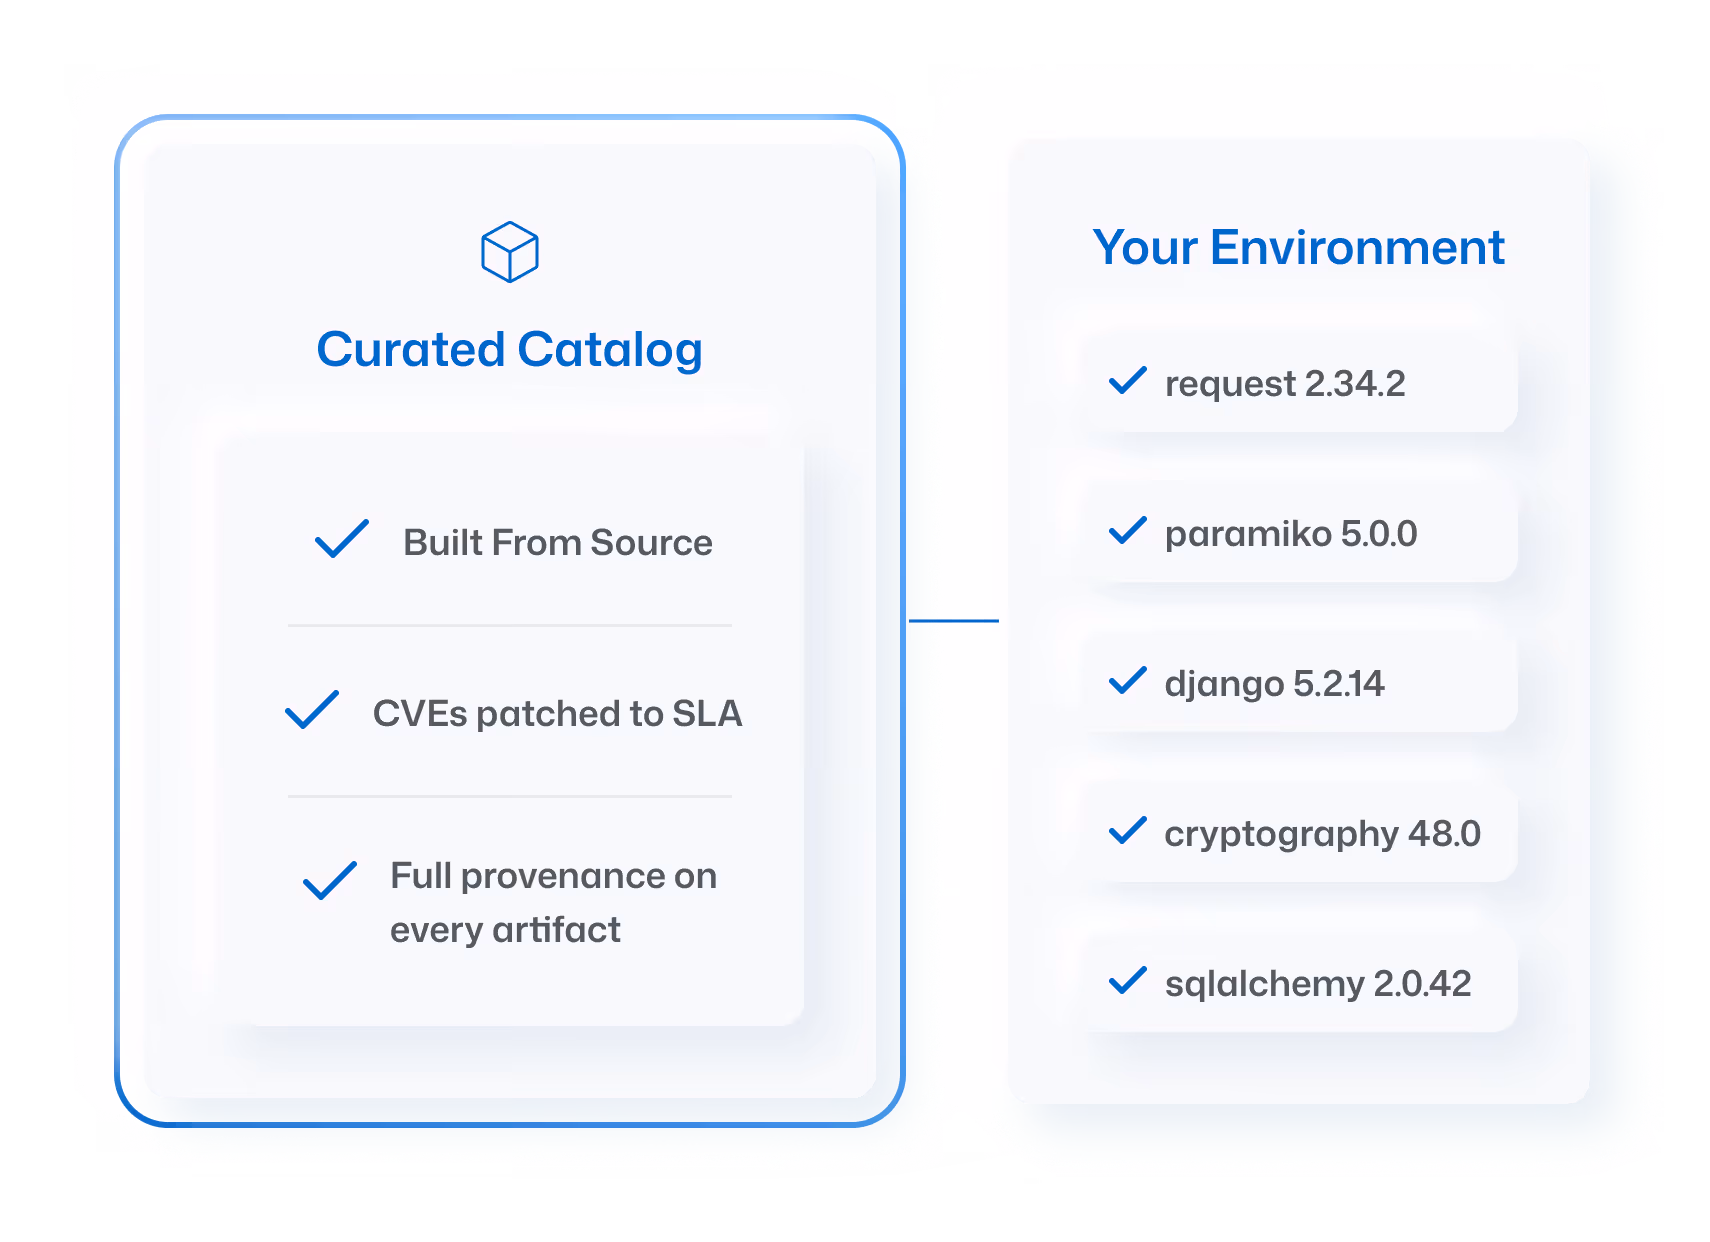
Built from source in SLSA Level 3 infrastructure
ActiveState compiles every component from its original source code in a hardened build environment. You get a verifiable chain of custody from source to binary, blocking known malicious packages before they enter your catalog.
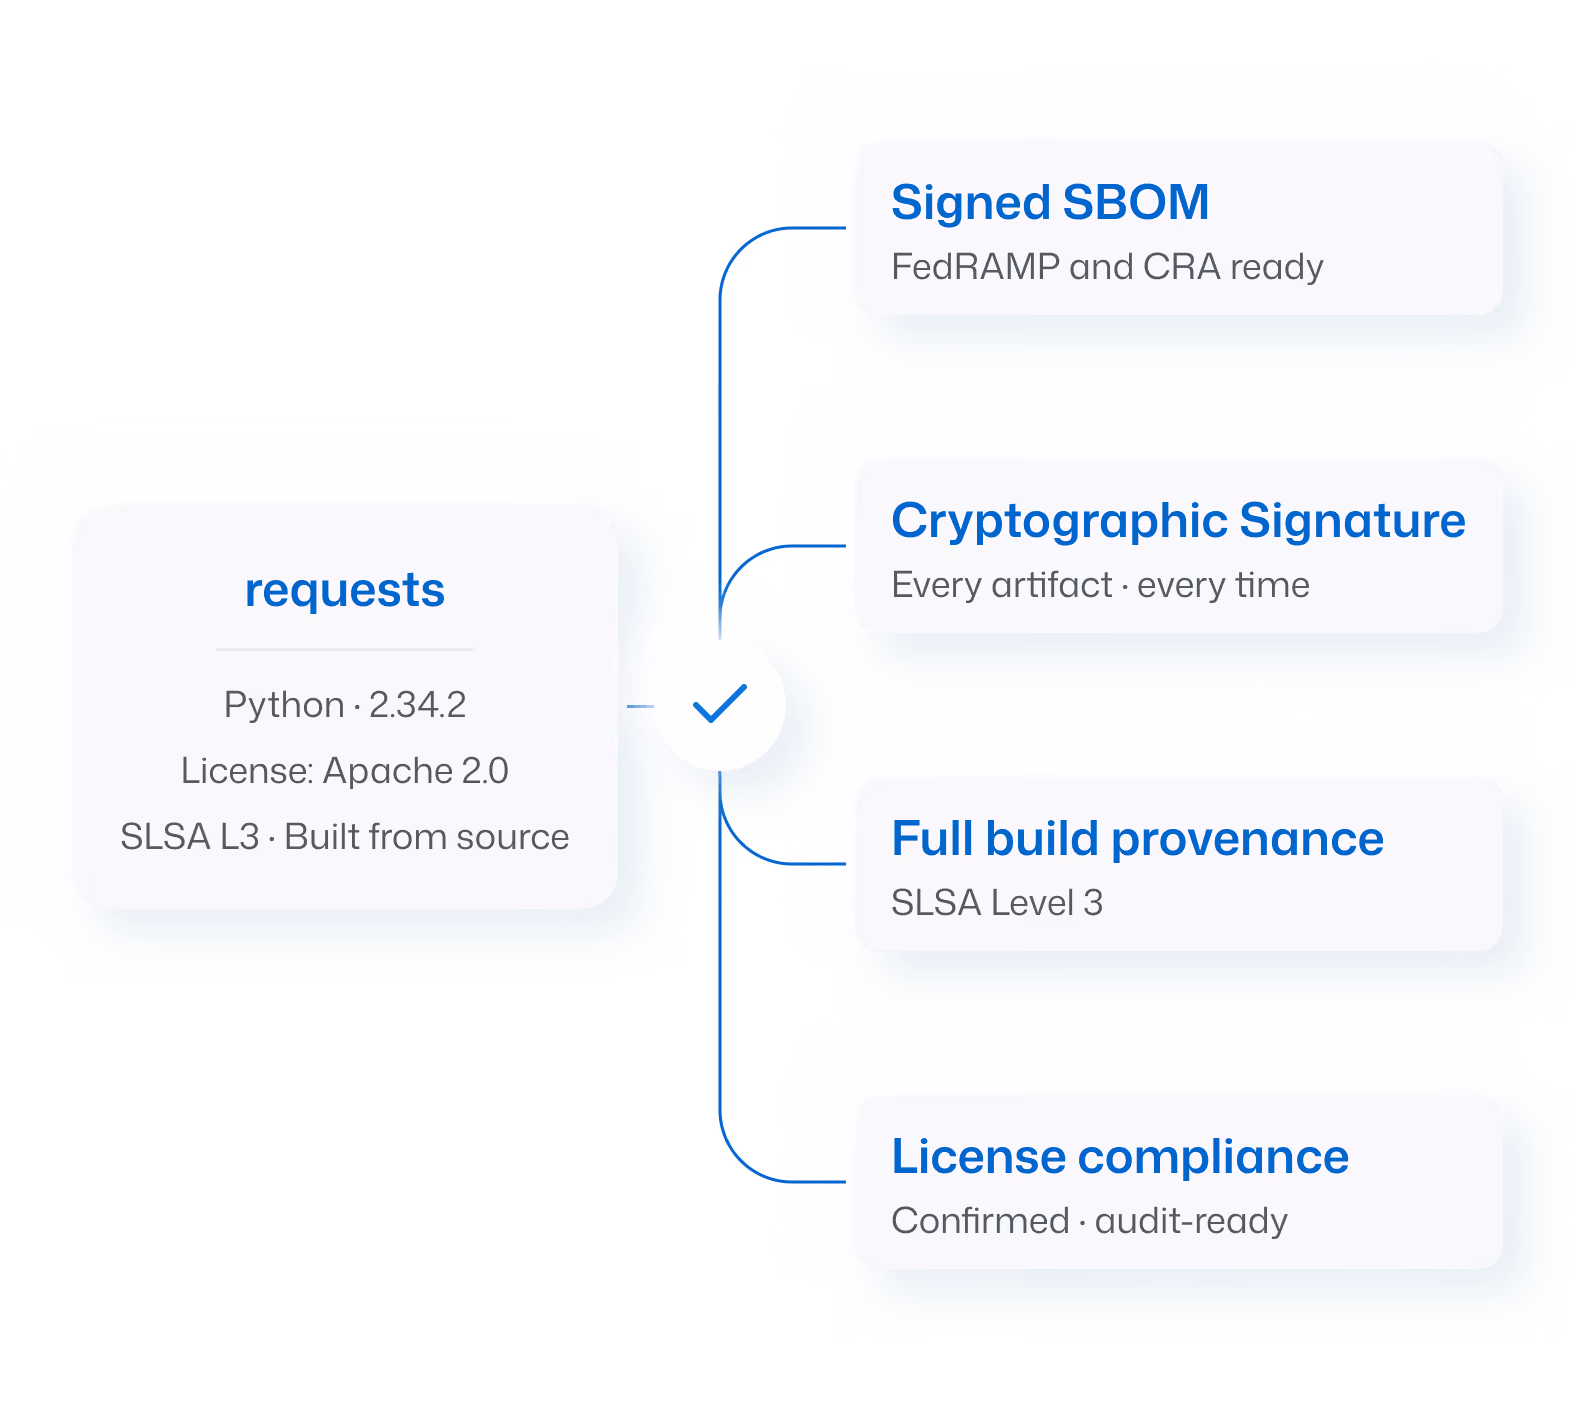
Full build provenance on every artifact
Cryptographic signatures and tamper-proof integrity
79M+ components across 12 language ecosystems
.webp)
Governance at the catalog level
A Curated Catalog lets your organization define exactly which components, versions, and licenses are approved. Developers and AI coding assistants pull only from vetted sources. Policy enforcement moves from the CI/CD pipeline to the upstream source.
Block unapproved packages before they enter any environment
Set license policies across the organization
AI code generators pull only from policy-compliant packages
Continuous remediation closes the loop
Provenance alone doesn't prevent future vulnerabilities. ActiveState monitors every component in your catalog and automatically builds affected packages when upstream fixes become available.
Critical CVEs remediated within 5 business days
Checked for breaking changes before publishing
Daily security feed across your full inventory
One managed source for your entire OSS footprint
Most organizations patch together coverage from single-ecosystem tools. Only ActiveState covers Python, Java, JavaScript, Go, R, C, Rust, .NET, and more from one platform, with all transitive and OS-level dependencies resolved.
.webp)
.png)

.png)
.png)
FAQs
How does building from source improve security?
Pre-compiled binaries from public registries can be tampered with at any stage. Building from source in a controlled environment ensures the binary matches the original code. You get a verifiable, reproducible artifact with full build provenance.
Does this protect against typosquatting and dependency confusion?
Yes. Components in the ActiveState Library are verified before entering the catalog. Known malicious packages are blocked. Developers pull from a curated source instead of the open internet.
What is SLSA Level 3?
SLSA (Supply-chain Levels for Software Artifacts) is a security framework for software supply chains. Level 3 means the build process is hardened, auditable, and resistant to tampering, with provenance generated automatically.
Can ActiveState replace our existing supply chain security tools?
ActiveState complements scanners and SCA tools by securing the upstream source. Scanners catch what's already in your code. ActiveState prevents risky components from entering your environment in the first place.
Still have questions?
Talk to our team.
See your software supply chain risk mapped
Book a demo and we'll walk through how ActiveState secures your open source software supply chain from source to deployment.
%20(1).webp)