As you may or may not know, Komodo is based on Mozilla, same as Firefox. You might even say Komodo is based on Firefox. As you may also know, Firefox has a very flexible addon system. In fact, there are very few areas of Firefox that you cannot customize with an Addon. People have written entire applications inside of Firefox, and entire applications have been written on top of Firefox’s foundation–Thunderbird, Selenium, Postbox and of course Komodo, to name a few.
No doubt you’ve all used Firefox at some point, or are currently using it to read this blog. And you’ve played around with its addons. No doubt you’ve also tried Chrome and have played around with its addons. And no doubt you’ve noticed how much more versatile and powerful Firefox’s addons can be. Now, I’m not trying to turn this into a Firefox vs Chrome blog, I’m simply trying to illustrate how powerful Firefox’s addon system is.
Which brings us back to Komodo; Komodo uses the exact same addon system Firefox does. Not only that, many of the addons written for Firefox can actually run inside of Komodo, although this can be very hit and miss and I would not recommend you try this unless the developer has tested his addon in Komodo. Point being though, it’s the same system.
This has always been the case with Komodo, and many developers have taken advantage of this by developing and contributing their addons. We would LOVE to see more contributors though, and with that in mind, we’ve started two projects over the past few years: the new Komodo SDK and the Addon Bootstrapper. I’m going to focus on the Addon Bootstrapper for the rest of this blog.
The Addon Bootstrapper

The Addon Bootstrapper was developed with one singular purpose in mind: to make it dead simple for someone to start a new Addon project for Komodo. Now before you race over and take the bootstrapper for a spin, I do want to point out that the project is still in beta and we intend to have it finalized by the time Komodo 11 is released. That said, it is fully functional and usable. It simply does not yet have all of the features we intend it to have.
The Addon Bootstrapper was built on top of gulpjs, which no doubt you are already familiar with. And if not, have no fear, it is dead simple to use.
So, let’s take it for a spin and create our very first Komodo addon. For this you’ll need Komodo IDE installed. (Note: while these general steps can apply to Komodo Edit too, we are focussing on Komodo IDE since running the terminal commands is not possible in Komodo Edit–you have to run them from your own terminal emulator.)
Bootstrapping Your First Addon
Start by downloading the latest version of the Addon Bootstrapper from GitHub, place the files in a new project folder that will contain your brand new addon.
Once done, fire up Komodo and point it at your newly created project directory. When you do this, Komodo should automatically detect that your project is using NPM and Gulp and show buttons for them in the dynamic toolbar.
TLDR Version
Before we jump into the nit and gritty, let’s give a quick summary of what we’re about to do. If you feel like you don’t want the detail, you could stick to this summary.
# Clone repo
$ git clone git@github.com:Komodo/Addon-Bootstrapper.git MyAddon && cd MyAddon
# Remove origin (we're not forking)
$ git remote rm origin
# Install dependencies
$ npm install && npm install -g gulp
# Install addon in dev-mode
$ gulp install-to-komodoide/10.2
Restart Komodo to use your newly created addon.
To Build and package our addon simply run
$ gulp build && gulp package
Too much to process? Read on for the full explanation.
Requirements
Hit the NPM button and select Run Command, Go to Anything will pop up with possible NPM commands to run. Type in or select Install and hit run command inside of Go to Anything. Then do the same thing again, but this time after hitting Install type gulp -g to install Gulp on your PATH. Now if you’re like me, npm probably isn’t configured to install global modules from a user account, so you’ll want to use a terminal to execute the command with sudo (Komodo does not currently facilitate you to run sudo commands).

Essentially we just ran the following 2 commands inside of Komodo:
 $ npm install
 $ npm install -g gulp
Writing our Addon
Now that we have all the requirements covered we should update the meta.JSON file in the root of our project directory.Open it up and modify it to suit your needs, or leave it as is if you just want to see the bootstrapper in action.
Once that’s done we can start writing our addon. In most cases, all of the files that you will want to modify are inside the src directory. Note: files inside the src directory may contain the string %AddonId%, this string will be replaced with the ID of your addon when it is built. In most cases you do not want to change this.
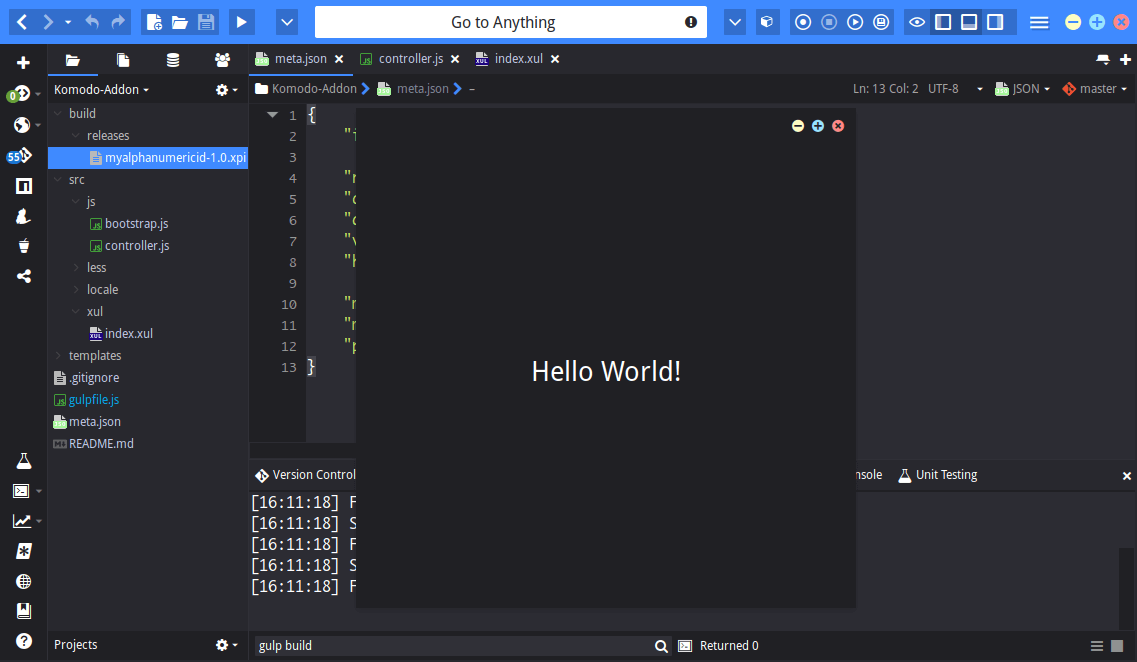
The addon bootstrapper comes with a functional “Hello World” example so it will place a toolbar button that, when clicked, will open a window with “Hello World” as the content. You can use that for the purpose of this step-by-step, or you can modify the src files as you see fit.
No doubt you’re probably at a loss at what SDK’s you can actually use, for this I would refer you to our SDK Documentation. If you run into any issues, post a question on our forums.
Building and Running our Addon
Now that we have all our code in place it’s time to run the addon–this is where gulp comes into play. Hit the Gulp button in Komodo’s dynamic toolbar and select Task: install-to-komodoide/10.2 (your entry may vary depending on your version of Komodo).

When that’s done, go ahead and restart Komodo.
When Komodo restarts you should have a new button on your dynamic toolbar that shows the “Hello World” window when clicked. You can modify your src files as needed, then hit the Task: build entry from the Gulp button to build your addon and click the button again in Komodo to see the changes. However, any modifications that modify the main Komodo window will require you to restart Komodo. That is one area we hope to improve before the Addon Bootstrapper is finished.

Packaging our Addon
Once done writing the addon you may want to share it with the community. To do this, hit the Gulp button and select Task: package. This will package the addon into a shareable .xpi file. To then share it with the community refer to our Submit a Package documentation.

And that’s all there is to it. I look forward to seeing your contributions!